♥The Pale Adventurer♥
Life is an adventure, let's make it fun💙 #ThePaleAdventurer #ThePaleAdventures
Makeup of the Day
Hey y’all, welcome back to my blog. This was a look I created a couple days ago when I was inspired by one of my Boxycharm boxes. The products are from my previous Boxycharm post and I was really feeling the vibrant colors in the eyeshadow palette, so I took to my vanity and let my creativity flow. The colors remind me of the perfect beach day, between the colorful ocean water and the rich melting shades of the sunset.
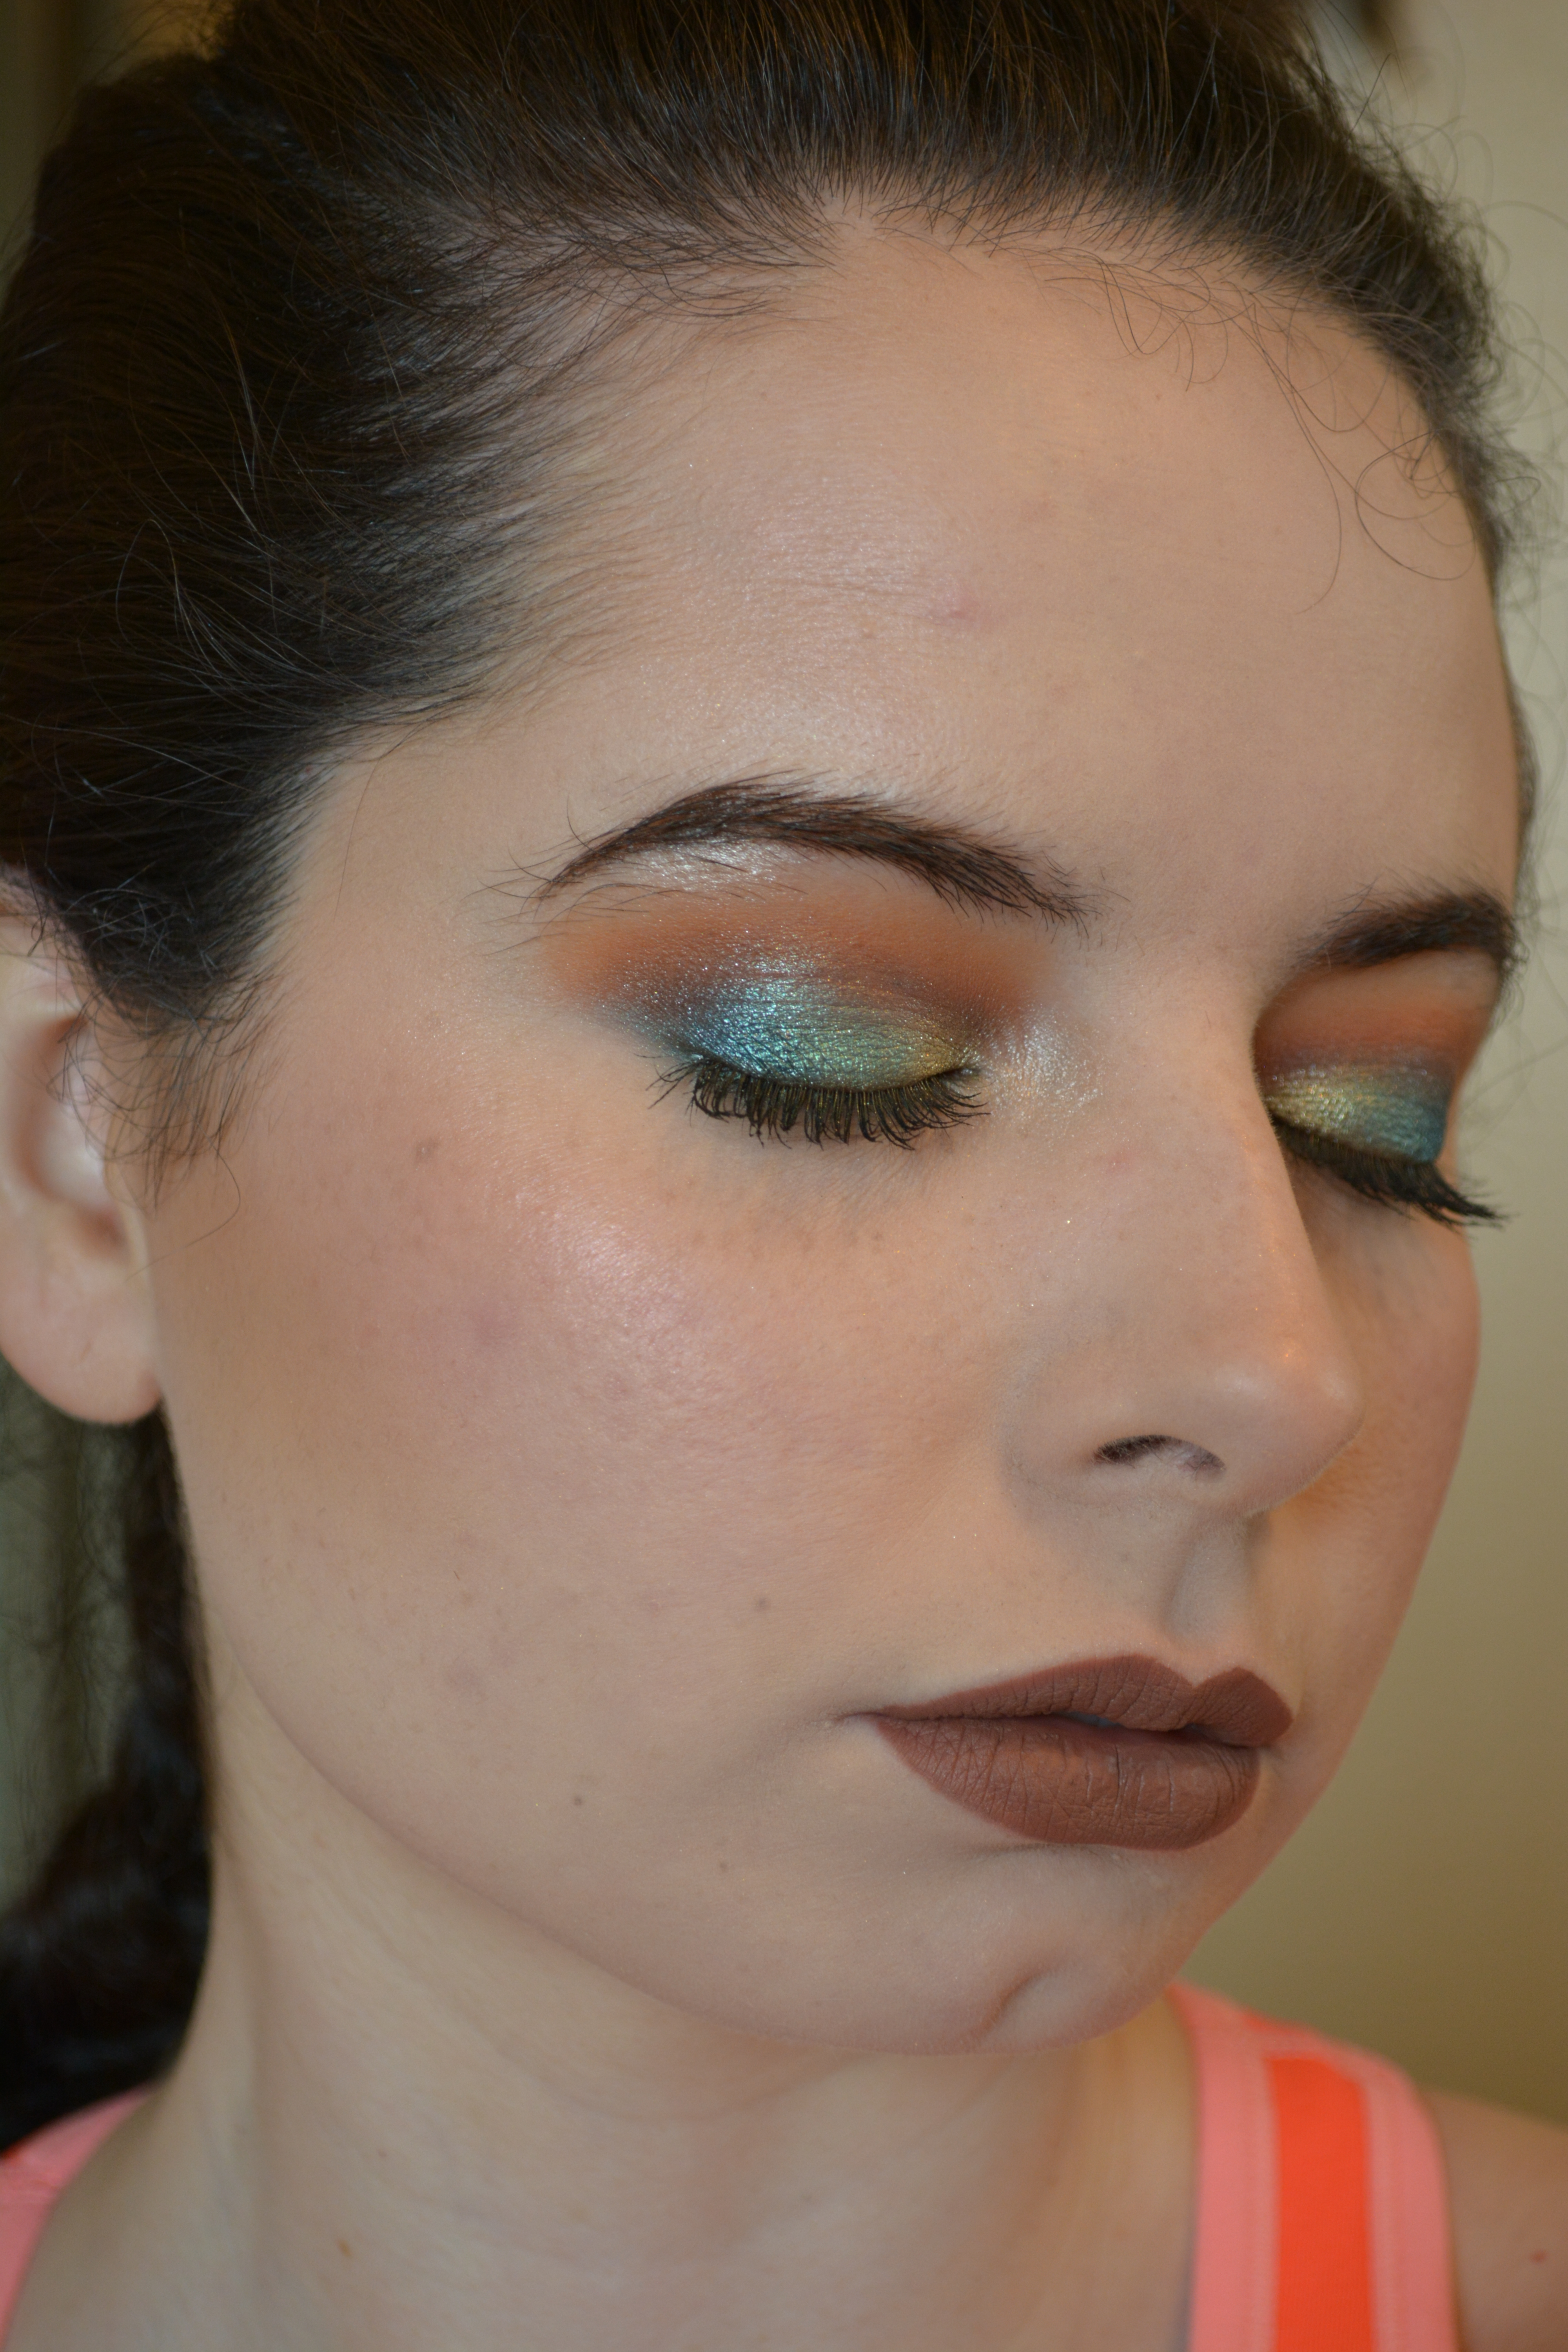

So, here’s a step-by-step of how I created this look:
- Too Faced – Shadow Insurance Anti-Crease Eye Shadow Primer:
- I apply warm a small dot amount of product in between my ring fingers and blot it all over my eyelid. The best trick I’ve learned with eyeshadow primer is to let it dry before applying eyeshadow over it. If I try to forego that, the application tends to get a bit blotchy and I end up wasting time and money having to start over.
- Sephora Collection – Colorful Eyeshadow (Lazy Afternoon – No 207):
- Using a wide, fluffy brush, (like the Nicka K – Makeup Brush (NB006 – Eyeshadow Round)) I apply this from my eyelid crease to my eyebrows to set the primer for my upper eyelid.
- Alamar Cosmetics – Eyeshadow Palette (Reina del Caribe: Vol. 1) :
- Coco-Taxi:
- With a fluffy, tapered brush, (like the Alamar Cosmetics – Ojitos Brush Trio (Fluffy Blender)) I blend this a little bit above the crease as my upper transition color.
- Guantanamera:
- Starting with a tight, tapered crease brush, (like the Crown Brush – Makeup Brush (C222 – Round Contour)) I lightly dab this color along the crease, descending in pigment intensity as I move towards the inner eye. Then, I use a slightly larger, fluffy, tapered brush (like the Luxie – Makeup Brush (Rose Gold: 229 – Tapered Blending) to blend it out so it creates a gradient effect with the previous colors.
- Tropico:
- Using a smaller, fluffy, tapered brush, (like the Anastasia Beverly Hills – Makeup Brush (Dual-Ended Brush) that comes in most of Anastasia Beverly Hills’ Eye Shadow Palettes) I blend this right below the upper transition color, but still above the crease, as the lower transition color.
- Veradero:
- Using a small, but fluffy tapered brush (like the Luxie – Makeup Brush (Onyx: 231 – Small Tapered Blending), I dab this color on the outer corner or my lid so the primer can lock in the depth of the pigment on the outer eye, and then blend this into my crease, descending the pigment towards my inner eye.
- El Malecon:
- Using a flat, condensed brush (like the Urban Decay – Makeup Brush (Naked 3 – Dual-ended), I apply this to my inner lids, not taking it further up than the crease.
- Celia:
- With a wide, fluffy brush (like the Urban Decay – Makeup Brush (Naked 3 – Dual-ended), I apply this to the mid-lid and gently blend into the colors on the inner and outer lid, but not over them.
- Veradero:
- Without grabbing extra product, I use the same brush from the initial application of this color to blend out the lines from the inner and mid-lid colors so that way it’s a seamless, gradient look.
- Cafecito:
- With a flat, thin brush (like the Luxie – Makeup Brush (Rose Gold: 221 – Flat Definer), I gently apply this along the upper lash line to create the look of fuller lashes.
- Coco-Taxi:
- Lancôme – La Base Pro Perfecting Makeup Primer:
- Using a little more than a pea-sized amount, I warm this up between my fingertips and rub this all over my face to create an even base for my foundation.
- It Cosmetics – Your Skin But Better CC+ Cream (Fair):
- I warm 1 pump of product in my fingers before applying all over my face and letting it settle for about a minute before applying product over it.
- Lancôme – Teint Idole Ultra Long Wear Foundation (090 Ivoire N)
- I push 2 pumps total, one on each side of my face, and blend first with a flat, foundation brush. Once product is evenly distributed, I blend it all out with my beloved beautyblender sponge.
- Too Faced – Peaches & Cream Collection (Peach Perfect):
- With a condensed face brush, I pack this on my under-eye area to prevent creases.
- Then with a large, fluffy powder brush, I set the rest of the foundation on my face to prevent product (like blushes, bronzer, luminizer) from breaking up throughout the day.
- Too Faced – Better Than Sex Mascara (Black):
- While my foundation sets with the powder, I take this time to apply my mascara. My method is to apply 2 layers, starting from the roots of my lashes, then gently shimmying upward toward the ends of my lashes, let that mostly dry, then apply 2 more layers, starting from the mids of my lashes and shimmying upwards, letting that mostly dry, then applying the last 2 coats on just the ends of my lashes. At that point, it’s easier to just keep my eye shut so I don’t get mascara all over my eyelid.
- Anastasia Beverly Hills – Brow Pro Palette:
- Starting with the primer, I use a flat, angled brush to outline the shape of my brows and lightly fill the primer in the denser areas of my eyebrows.
- Then, using the color Chocolate with the same brush from the primer application, I apply that darker color on the tail end of my brows and the lighter color for the inner half of my brows.
- Benefit Cosmetics – Cheek Parade (‘Beauty and the Beat’ Blush Kit):
- Hoola:
- Cheek Contour: Using a large, angled face brush, I apply this along the contour below my cheekbones, descending pigment as I blend towards the center of my face. Rule of thumb is for the contour not to go further inward than the arch of our brows to prevent the face from looking dragged down.
- Temples: Using the same brush as I did for the cheek contour, I lightly blend this in my temples to create the look of less width around my eye area.
- Upper hairline: Again, using the same brush as the previous step, I blend this along my hairline to give the look of a smaller forehead.
- Nose: With a fluffy, tapered brush, I start blending from the sides of the bridge of my nose and blending outward, but not blending past the sides of my nose.
- Galifornia:
- With a medium, fluffy face brush or an angled, fluffy face brush, I blend this first on the apples of my cheeks and blend outwards towards my hairline, along my cheekbones, descending in pigment intensity as I work outwards.
- Rockateur:
- With a fluffy, highlighter brush, I blend this along the top of my cheekbones to add shimmer and draw attention to that area and then lightly blend it above the arch of my eyebrows and my temples.
- Using a flat, tapered brush, I blend this along the bridge of my nose to draw attention to that area and create the look of a thinner nose.
- With the same brush, lightly blend this along my cupid’s bow, not the entire upper lip. Every set of lips is different, but with the way my lips are shaped, I only apply it on the cupid’s bow and blend it out to where the bow drops and not go any further outwards so it doesn’t look like I took a big gulp from a shimmery drink.
- Hoola:
- Alamar Cosmetics – Eyeshadow Palette (Reina del Caribe; Vol. 1):
- I take this time to fix any speckles of mascara that may have gotten on my eyelid and reapply colors if needed.
- La Costa:
- Using a flat, tapered brush, I blend this in the inner groove of my eyes (between my nose and tear duct area) and right below my eyebrow arches.
- Celia:
- Using a small, tapered, flat brush, (like Luxie – Makeup Brush (141 – Mini Round)) I blend along my lower lash line to tie the look together so that way my under eyes don’t look opaque and flat. It makes such a drastic difference in the entire look and I recommend it for improving any makeup look unless you’re going for a no-makeup or minimal makeup look.
- Pixi Beauty – Brow Tamer (Translucent):
- With light strokes, I apply this with the spoolie wand to set my brows.
- Urban Decay – Makeup Setting Spray (All Nighter):
- In an “X” pattern, I spray this around my face to set my makeup and allow to dry before continuing with any other products.
- Too Faced – Softly Illuminating Translucent Powder (Candlelight):
- With the same loose, fluffy, face brush I used with the powder to set my face, I dust this lightly over my entire face to add a subtle glow to my complexion. It helps reduce the look of imperfections like fine lines and large pores. In my opinion, it creates the look of a social media picture filter, without the flower or butterfly crown.
- Jonteblu – Eyeliner Pencil (Charcoal):
- I glide this along my upepr & lower water lines too added intensity.
- Ofra Cosmetics – Long Lasting Liquid Lipstick (Verona):
- Starting from the lip line and working inwards, I apply this on my lips and reapply throughout the day.


You must be logged in to post a comment.